Data Loss Protection filters
DLP filters allow you to block Data Loss and comply with various Regulatory Policies with a user-transparent, centrally based, policydriven data loss prevention filter. When these are in place, users simply send email, and the appropriate action is automatically taken.
DLP Dictionaries and Smart Identifiers provide automatically updateable policies for lowest administrative cost and highest accuracy. Always know where your private or proprietary data resides—including intellectual property, personal dentification, patient information, financial information, and more—so you can simplify discovery, and quickly evaluate the data in order to make an appropriate response to any issue.
How to create a DLP filter to protect privacy data
- Click Company Settings.
- Click Filters.
- Select the Outbound tab.
- Click New Filter.
- Choose a name for your filter (e.g. Encryption - DLP[term]).
- Click Continue.
- Ensure Scope is set to Company.
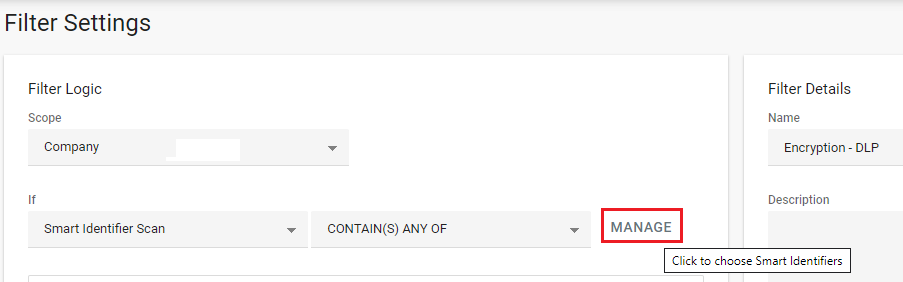
- If statement
- First Parameter: Dictionary Scan or Smart Identifier Scan
- Second Parameter: Cannot be changed from "CONTAIN(S) ANY OF"
- Third Paremeter:
-
- Click Manage.
- Click Manage.
-
- In the pop-up, click the arrow to see the DLP term.
-
- Check the box for the appropriate term.
-
- Repeat steps above as needed.

- Repeat steps above as needed.
-
- Click Close.
- Do statement
- Select Encrypt
- Click Save.
NOTE: When selecting DLP, it would be best to use both Dictionary and Smart Identifier Scan to use terms like:
- Smart Identifier: Financial Information > Credit Card Number
- Dictionary: Personal Information > Credit Card Terms
- Utilizing both terms in the same IF statement will help ensure less false positives on a single term being used.
In step 9, it is optional to Add Another Action, then also set: Stop Processing Additional Filters.