Free/Busy Information Display
The free/busy feature allows others to see meeting times scheduled on your calendars. The free/busy feature is on by default, but you can turn it off or limit who can see the information.
- Go to the Preferences > Calendar page.
- Scroll to the Permissions section, select the Free/Busy option that you want to set for this calendar. If you select Allow only the following internal users to see my free/busy information, in the text field enter the email address of the internal users.
- (Optional) In the Invites section, specify who can invite you to meetings. If you select Allow only the following internal users to see my free/busy information, in the text field, enter their internal user names or full email address.
- If you limit who can invite you to meetings, you might want to select Send to send an auto-reply to users who are denied from inviting me.
- Click Save.
Note: These settings do not affect calendars that you have configured to not display free/busy information.
Send Your Free/Busy Status to Others
You can email a link of your free/busy status that shows appointments in your personal and shared calendars.
- Click the Calendar tab.
- In the Calendars Overview pane, click the gear icon.
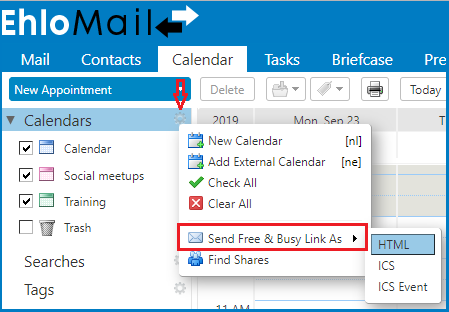
- Click Send Free & Busy Link As and select to send the information as either HTML, ICS, or an ICS Event.
- In the Compose Email page that opens complete the address and subject line. The calendar link is in the text area. Add more information if you want.
- Click Send to send the email to the users. The recipients can click the link to view your schedule. Your calendar updates itself for the recipients when you add new events to your calendars.