Briefcase Folders
Creating Briefcase Folders
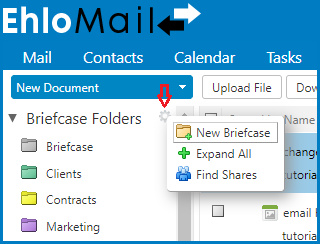
- Go to Briefcase > Folders.
- Click the gear icon and select New Briefcase.
- Enter a Name for the new briefcase folder.
- The briefcase folder name must be unique within the hierarchy of your all of mailbox folders. This name cannot match any top-level folder in your mailbox, calendar, or address book. For example, if you have a calendar named Holidays, you cannot name a top-level briefcase Holidays. Holidays could be a name of a briefcase within another briefcase.
- Select the Color of the new briefcase file.
- Select the folder hierarchy, either under Folders or under another briefcase folder. You can create a new top-level briefcase, or you can place it under an existing briefcase.
- Click OK.
Adding Files to Your Briefcase Folders
Uploading a file copies a file from your personal computer to your EMWC account. This makes the file available any time you log into your account. You can upload files in the following ways:
- Clicking attachments you receive with your email messages.
- Using the file upload tool when working in Briefcase
- Using WebDav Client tools
Upload Files from Briefcase
- Go to the Briefcase tab and select the Briefcase to save the file.
- Click Upload File and Browse to find the file to upload.
- In the Notes text field, add any information about the file. This information is displayed in the file list.
- To add another file, click Add.
- You cannot upload a file with the same name to the same briefcase. If a file is uploaded that already exists in the folder, an Upload Conflict dialog displays. You can either click Yes to upload the file, overwriting the existing file, or click No.
- The version number is updated if a file is overwritten.
- When all files are uploaded, click OK.
Note: If you selected the wrong briefcase, you can use drag and drop to move the file to the correct Briefcase folder.
If the file is too large, a warning displays. Files that you upload impact your account quota.
Upload Email Attachments to Briefcase
- To add the attachment, click the add to briefcase link in the message header next to the Attachments link.
- In the Add to Briefcase dialog, select the destination folder or create a new briefcase folder.
- Click OK.
Note: A copy of the attachment is put in our Briefcase folder. If you are managing your quota, you may want to delete the attachment in the email when you add upload the attachment to your Briefcase.