Manage Calendars
Create Calendars
One calendar is created for you by default. You can create additional calendars to keep track of different type of functions. For example, you can create one calendar for work, one for personal appointments, and one for company activities.
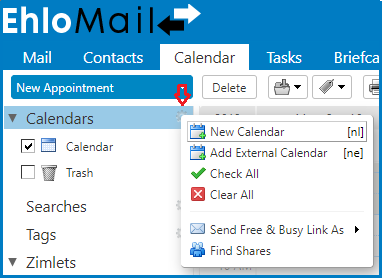
- Click the Calendar tab.
- Click on the Options Gear icon> New > Calendar.
- In the Name text box, type the name of the calendar.
- Select a color for displaying the Calendar’s activities.
- To prevent others from seeing your calendar when scheduling appointments, select Exclude this calendar when reporting free/busy times.
- To synchronize this calendar with a remote calendar, select Synchronize appointments from remote calendar. Enter the URL for the remote iCal file.
- Click OK. The new calendar will display in the Calendar list.
Organize your Calendars into Groups
If you manage multiple calendars, you can group the calendars in a hierarchical display. For example, you could group all shared Calendars under a Calendar folder you call Shared. You can also move the calendar.
- In the Calendar Overview pane, select a calendar and drag it to the calendar to be nested under.
- Alternately, right-click the calendar to move and select Move.
- In the Choose Folder dialog box select the calendar to move under.
Add Color to a Calendar
You can color-code calendars so that activities for that calendar always display in the selected color, which is helpful when you are looking at activities from multiple calendars in one view. You can use a color more than once.
- Right-click on the calendar and select Edit Properties.
- Select a color from the drop-down menu.
- Click OK.
View Multiple Calendars
Meetings display in the selected Calendar view in the calendar color selected. If meetings are scheduled that are not in the current time view, an arrow displays on the calendar’s page indicating that there are meetings scheduled that are not in the current view.
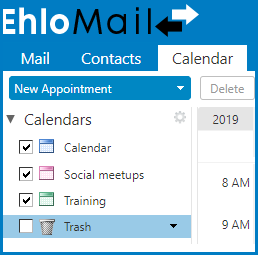
In the Calendar list in the Overview pane, check the boxes for the calendars you want to view.
- Select the view.
- Day view shows the calendars side-by-side. The calendar name is at the bottom of the page.
- The Work Week, Week, and Month views show appointments on the calendar by the color associated with the calendar.
View Calendar Activities in a List
The List view gives lets you view details that are not available in the other Calendar views. You can change how the information is presented. When using the List view you can:
- Show appointments in a specific date range. Set the from-through dates in the Show appointments text boxes.
- Click the Calendar column header to arrange the appointment by individual calendars.
- Click the Status column header to see appointment by your status
- Click the Subject column header to see an alphabetic view of the Subjects.
- Select multiple appointment check boxes to act upon more than one message at a time. Right-click and select the action to perform.
Display All Day Appointments in Your Work Week View
All day events are displayed in the first row of the calendar with no time specified. You can hide all day events in your calendar.
- In Work Week View, click on the thick line in the first row. The first row is hidden. Viewing all day appointments can be toggled back on off.
- Click on the thick line below the header row to display the appointments.