Creating and Viewing Tasks
Task Lists
When you create a new task, you select a Task folder, also referred to as Task list, for which to track the task. By default, the Tasks list gives you a list view of all your tasks in the Tasks folder. You can create different task lists, in addition to the default Task list, and configure the lists to synchronize with the tasks from a remote iCal To Do list.
- Go to the Tasks page.
- In the Overview pane, click the Tasks gear icon and select New Task List.
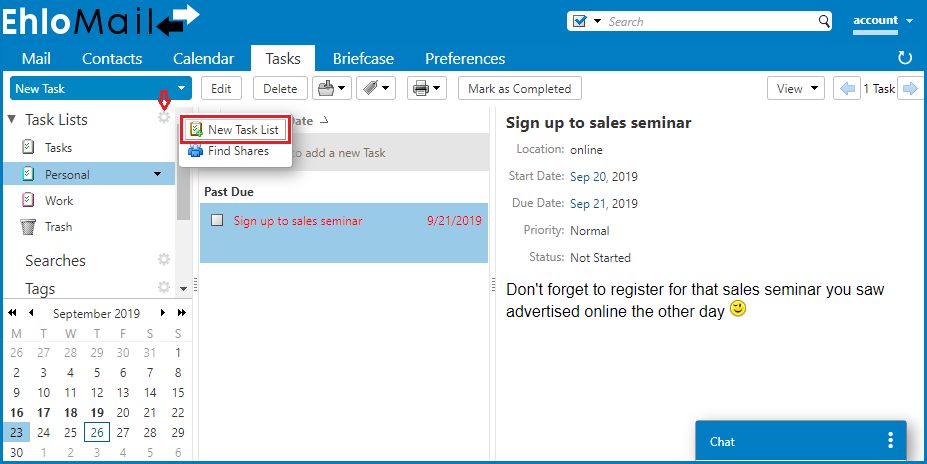
- Enter a Name and select a Color for the new task list.
- To Synchronize tasks from a remote service, select the check box and enter the URL.
- Click OK. The task list is displayed in the task list.
Creating a Task
Create a new task by entering the task name in your tasks list, or you can open a new task page and add detailed information about the task and include notes and attachments.
Add a Task Quickly
- Go to the Tasks page and in the Overview pane select the task list to which you want to add a task.
- In the Click here to add a new task text box in the Content pane, enter the new task name.
- Press Enter. This adds the task subject to your task list, but it does not give any details. To add details, edit the task.

Note: If you created a task in the wrong list, open the task and select the correct list from the Task Lists drop-down, or you can drag and drop the task on the Content pane to the correct list
Create a Detailed Task
You can use your task lists to create and track the progress of a task. In addition, you can write notes and attach files for easy access from within the task. Having all of the relevant information with your task is useful when you share your task list with others.
You can estimate the length of the project by entering the start date and the due date and set the priority. When you start the task you can select the status such as Not Started or In Progress, and select the percentage complete.
- Go to the Task page and select New Task.
- In the Details area, enter the task information. Only Subject is required to give the task a name.
| Option | Description |
|---|---|
| Subject | (Required) Enter a brief description of the task. The text added becomes the description in the task list. |
| Location | Enter where the task occurs. |
| Priority | Select the priority for this task. |
| Task List | Select the task list where you want this task displayed. |
- In the Progress area, enter the information to track the progress of the task. This information is not required for your task.
| Option | Description |
|---|---|
| Status | Select the status for this task. You can reopen this task and change the status at any time. |
| Percentage | Select a percentage to go with the status of the task. You can reopen this task and change the percentage at any time. |
| Start Date | Define the start date for the task. |
| Due Date | Define the due date for the task. |
| Reminder | Set a reminder date and time. |
| * If you have configured an email address or SMS alert in your Preferences > Notification page, check the appropriate box for the reminder. | |
| * If you have not configured a notification, click Configure to go to the Preferences > Notification page to set this up. | |
| Add attachments | Click Add Attachments on the tool bar to add any notes in the text field and to add attachments. |
- Click Save.
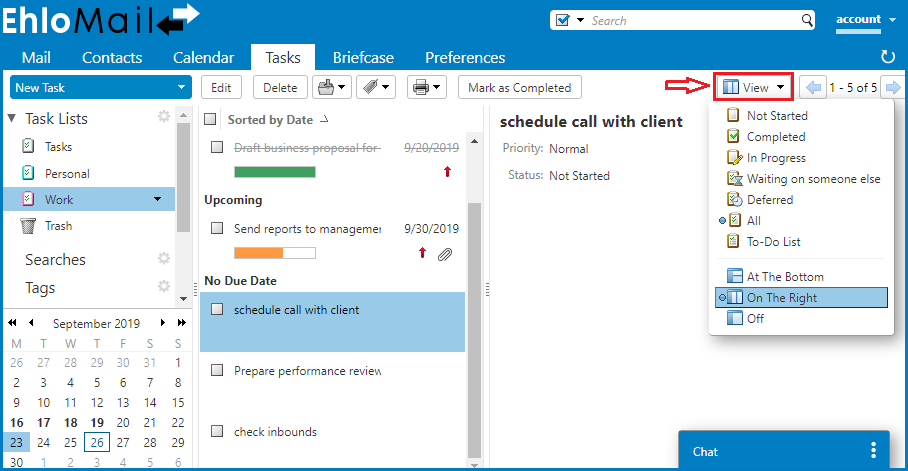
Viewing Tasks in the Reading Pane
You can enable a Reading pane to view the content of a task without opening the task. The Reading pane can display at the bottom of the Content pane, on the right of the Content pane, or you can turn it off so there is not reading pane.
- Go to the Tasks page.
- Click View on the Task toolbar to select how to display the Reading pane.
| Option | Description |
|---|---|
| Reading Pane At The Bottom | The task list view displays at the bottom of the pane. |
| Reading Pane On the Right | The task list view does not show the status of a task, and the percentage completed is shown as a progress bar. |
| Reading Pane Off | The reading pane does not display |